Raijintek Scylla Pro CA360 CPU Liquid Cooling Kit Review
Hardware Installation & Performance Evaluation
Contents
Antila D5 RBW ADD’s instructions use the same Paean open-air chassis as we’re using, so it seemed like a great start:
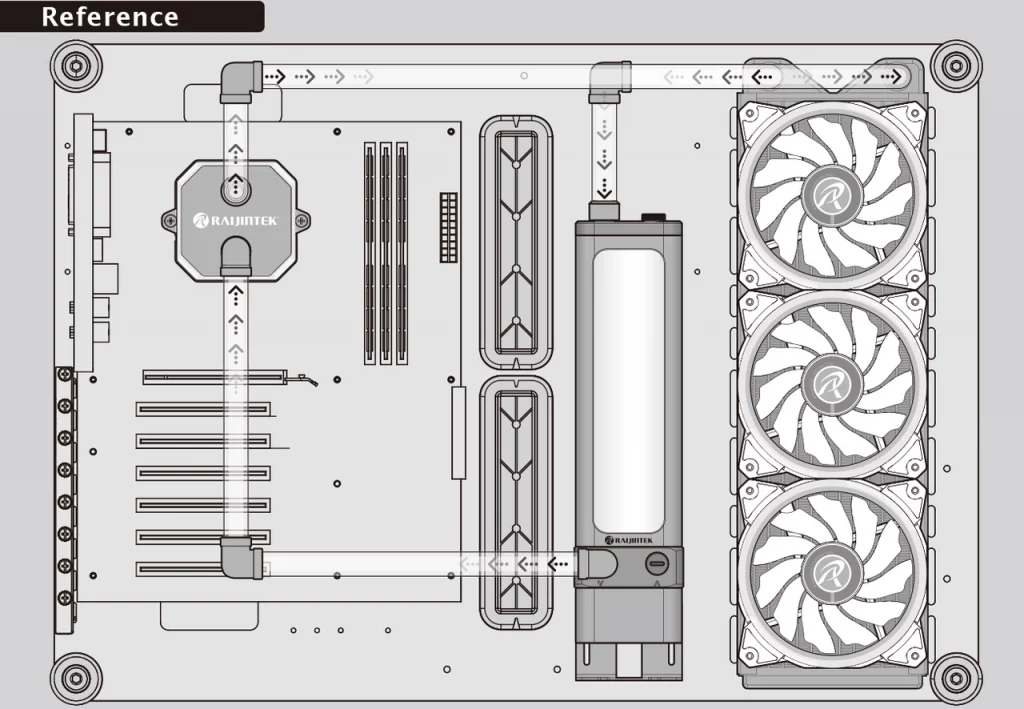
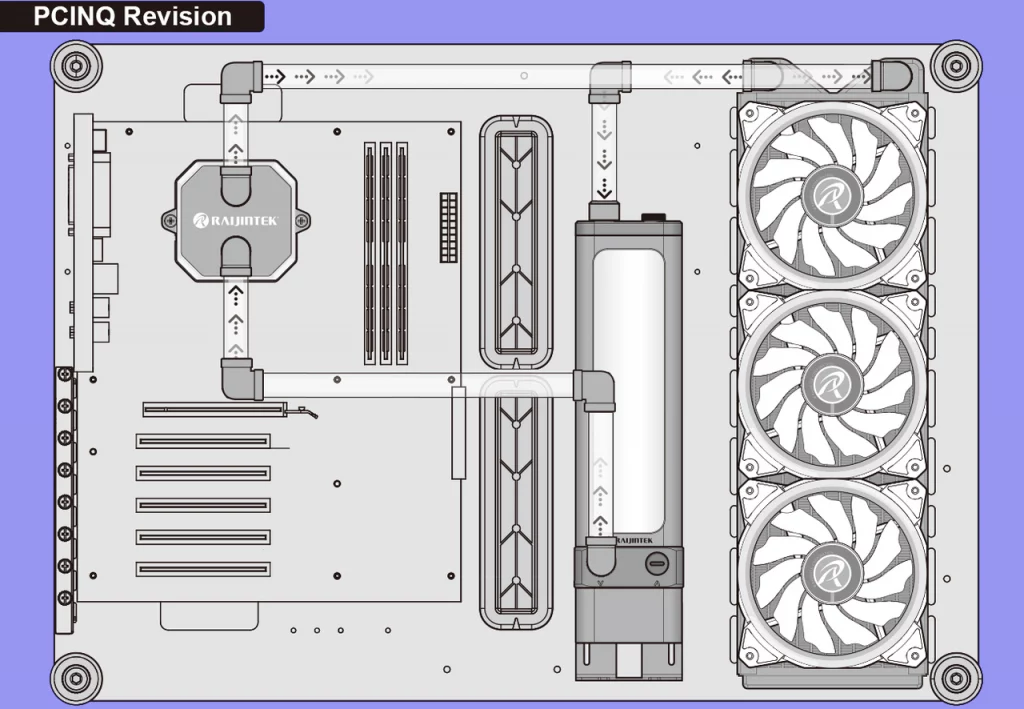
The only change we wanted to make to the suggested layout is to get the tube out of the way of graphics card removal. That should be as simple as flipping the loop, since our motherboard’s top slot position is empty. We borrowed the Raijintek’s image to more easily illustrate this change:
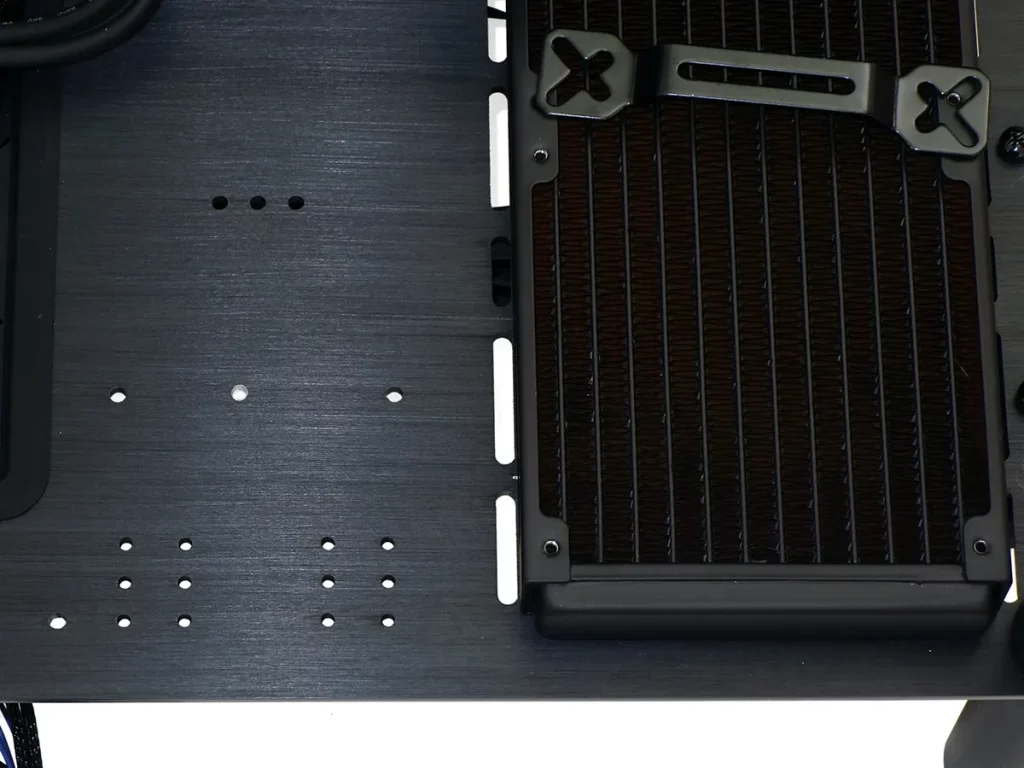
Our first issue in matching Raijintek’s suggested layout was figuring out how we’d like to mount the pump. The Antila’s optional brackets are only designed to fit 120mm fan screw spacing and its factory-installed bracket is only designed to fit a chassis floor. The floorless Paean has many holes next to the radiator for mounting various pump brackets, but none of those holes are the correct spacing to fit the Antila D5 RBW ADD. Time to drill a hole!
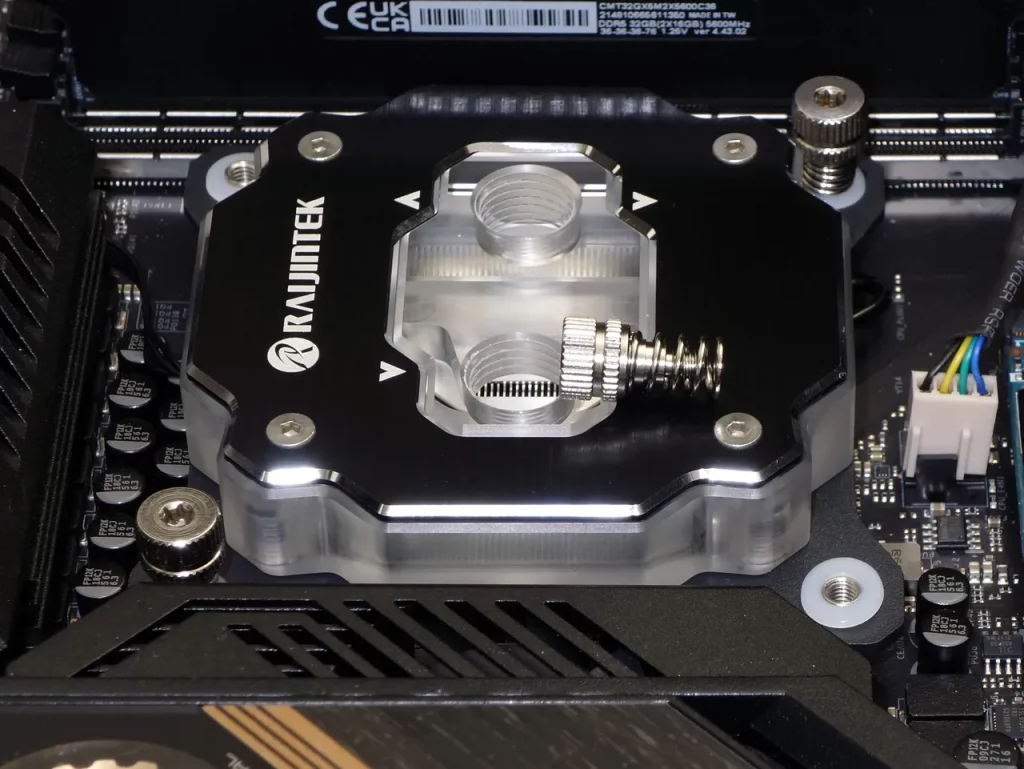
Next up is mounting the water block: Raijintek says that we need to install four washers on the back plate, add the top spacers, add four washers to the top spacers, then add the screws (with springs). The problem is that the screws aren’t as long as the springs. To install the first two screws, we first had to tighten one with the block cocked edgewise, use one hand to press the water block flat against the CPU, and use the other hand to push the screw across from it into its mating threads. Lacking hands that small, the last part required us to find a T20 Torx driver to mate with the screwhead for the final push and twist. We tightened the first two screws until these bottomed gently, and continued using the Torx driver to compress the spring when installing the other two screws.
The problem with side-mounted radiators is that they require two additional bends to point their connectors toward the motherboard and reservoir. Raijintek’s illustration didn’t include those elbows but instead attempted to show how the lines could come straight out of a front-mounted radiator when using a different case than the one shown in that same illustration.
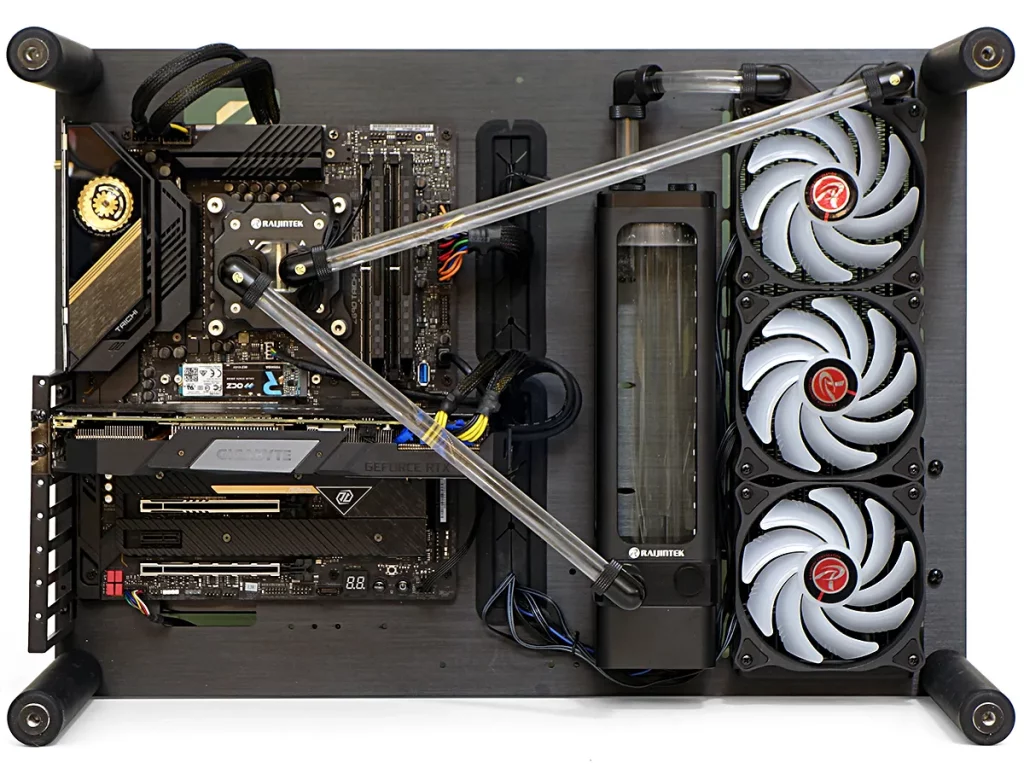
Our desired layout would have required nine 90° bends, but the cooling kit only includes six. Were we to pair our installation down the only the included parts, the three bends that would have routed the tubing around the graphics card and memory had to go. But wait you say, there’s something fishy about one of those lines?
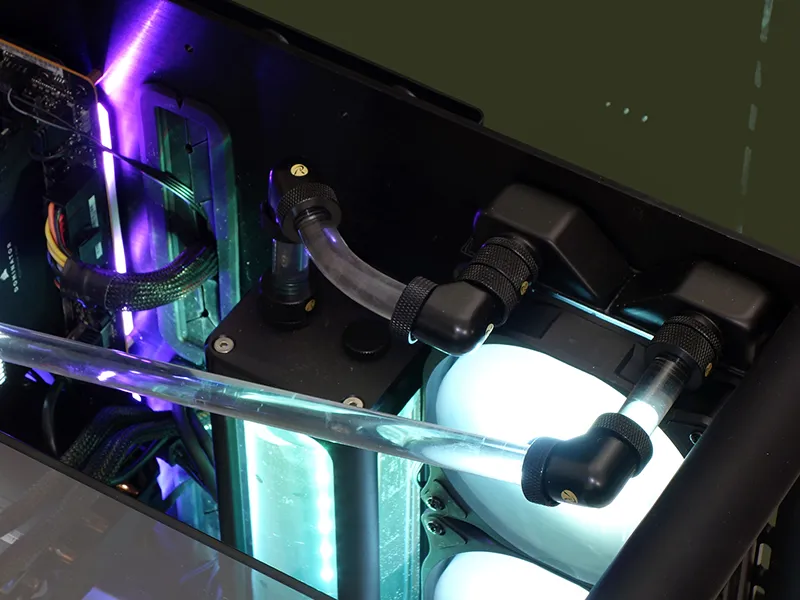
We’re committed to using only the parts provided in the kit, but the combination of a straight fitting and elbow sticks out 32mm too far to align with the top of the reservoir. Moving the radiator/reservoir 32mm away from the chassis could have fixed the problem, but no brackets were provided. Substituting the included fittings for the lower profile of a right-angle threaded adapter would also have worked, but again none were provided with the kit. With no bolt-in solution available from the included parts…we found a solution that nearly any builder could do at home without a bending kit or the heat gun that they might have bought to go with it: We heated the tubing in a boiling pot and bent it with a glove until it cooled, relying on the large radius of our bend (rather than a bending kit component) to keep the tube from collapsing. FYI the correct boiling temperature was reached after adding approximately 1 part salt to 16 parts water.
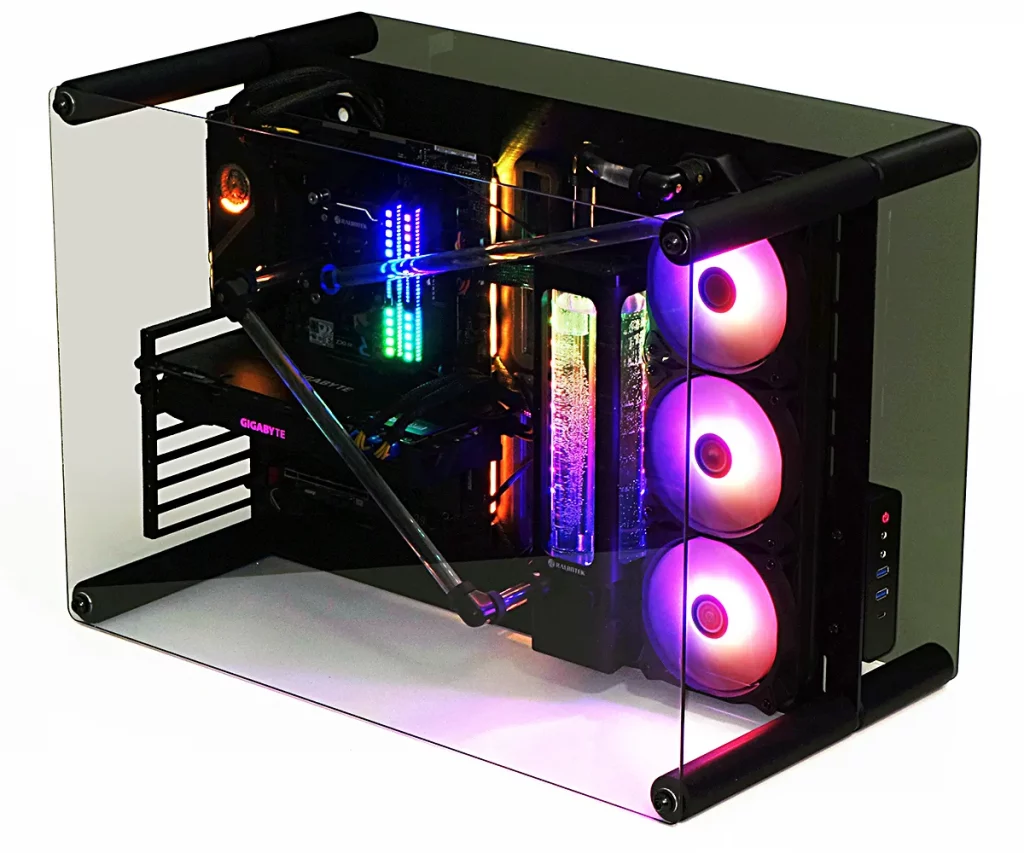
One thing that immediately jumps out from the completed build image is that we forgot to connect the water block’s RGB lead. Here’s what it looks like lit. Rather than rebuild the now-disassembled machine, we’ll put the same cooler into an upcoming case review.
| System Configuration | |
| Case | Raijintek Paean Open-Air ATX Mid-Tower |
| CPU | Intel Core i9-12900KF: 16C/24T, 3.2-5.2 GHz, 30 MB L3 Cache, LGA 1700 |
| Comparison Cooler | Alphacool Eisblock XPX CPU, VPP655 with Eisbecher D5 150mm, NexXxoS UT60 X-Flow, 2x Vardar 2100RPM |
| Motherboard | ASRock Z690 Taichi, BIOS 1.43, LGA 1700 |
| RAM | Corsair Dominator Platinum RGB CMT32GX5M2X5600C36 DDR5-5600, 2x 16GB Kit |
| Graphics | Gigabyte GeForce RTX 2070 Gaming OC 8G: GeForce RTX 2070 1815 MHz GPU, GDDR6-14000, Maximum Fan When Listed |
| Hard Drives | Toshiba OCZ RD400 256GB NVMe SSD |
| Sound | Integrated HD Audio |
| Network | Integrated Gigabit Networking |
| Power | be quiet! Dark Power Pro 10 850W: ATX12V v2.3, EPS12V, 80 PLUS Platinum |
| Test Configuration | |
| Load Software | AIDA 64 Engineer Version 6.00.5100, Stress CPU, FPU, Cache, GPU |
| H/W Monitoring | HWiNFO64 v6.28-4200 |
| SPL Monitoring | Galaxy CM-140 SPL Meter: Tested at 1/4 m, corrected to 1 m (-12 dB) |
Rated at up to 1800 RPM, Raijintek’s EOS fans ran at 1640 RPM in our configuration. While direct comparisons between its triple-fan 27mm-thick radiator and the Alphacool’s dual-fan 60mm-thick radiator are difficult, pairing 2100RPM fans with the Alphacool configuration’s extra thickness should diminish any difference attributed to its lower fan count.


The Scylla Pro gives us a slightly lower CPU temperature and a slightly higher chipset temperature. We’ll treat our choice of location for the Antila D5 RBW ADD pump/reservoir combo as a potential airflow restriction near the chipset, and chalk up its small CPU cooling win to its Forkis Pro RBW water block.
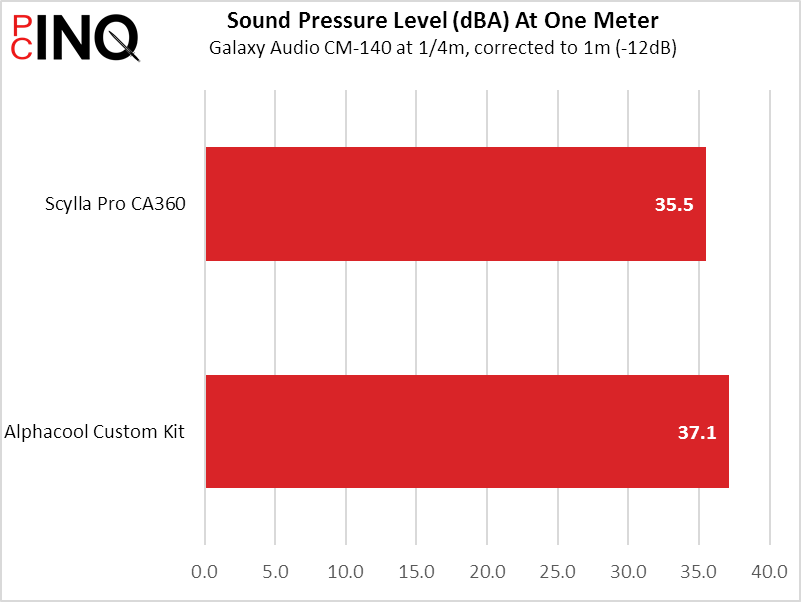

Since we tested the cooler as a system, graphics card noise was the biggest chunk of system noise. The Scylla Pro still emerged as slightly quieter and slightly cooler, with a 9% overall performance lead compared to our scratch-built Alphacool kit.
Having viewed the Scylla Pro CA360’s powerful performance, buyers are left to question whether it’s easy enough to install and has a good enough value. Our answer to the first question is mixed, since it only has enough elbows to cleanly install its radiator to a front-mount chassis and its water block screws are a little difficult to manage. Our first suggestion would be to add two more elbows and two 90° threaded fittings to make it properly fit side-mount radiator cases like Raijintek’s own Paean: Experienced builders might instead prefer to use a length of silicon cord to support the tubing during a heat bend, and adding one would be super-cheap. Regarding the water block’s screw installation difficulties, each screw has only around 6mm of threads fitting into a hole that’s over 12mm deep, and lengthening the screws even just 4mm would certainly help people get them started.
US buyers are left to get their Scylla Pro CA360 kit directly from Raijintek via its Newegg store for $450, but Canadian customers can find better deals for some reason. Compared to the cheapest EK kit to include a D5 pump at nearly $580, the Scylla Pro CA360 offers good value even at US pricing.
| Pros: | Cons: |
|
|
| The Verdict: | |
| The Scylla Pro CA360 offers great performance and a good price on a kit that’s complete enough to serve most front-panel radiator builds. Side-mounted radiators require either more elbows or custom tubing bends to avoid our messy line routing. | |
With excellent performance, appearance and price, we’re forced to put aside installation quibbles to give Raijintek’s Scylla Pro CA360 our highest award.


