Build Tech: How To Connect Your PC’s Cooling Fans
We can never overstate the fact that building a PC is supposed to be easy: These things are designed by expert fools to be fool proof. It’s in that spirit that we begin with the basic premise of the PC fan, a three or four wire device that plugs into your motherboard. Shown in the center of the photo below is the original standard for PC fans, with its predecessor on the left and its successor on the right.
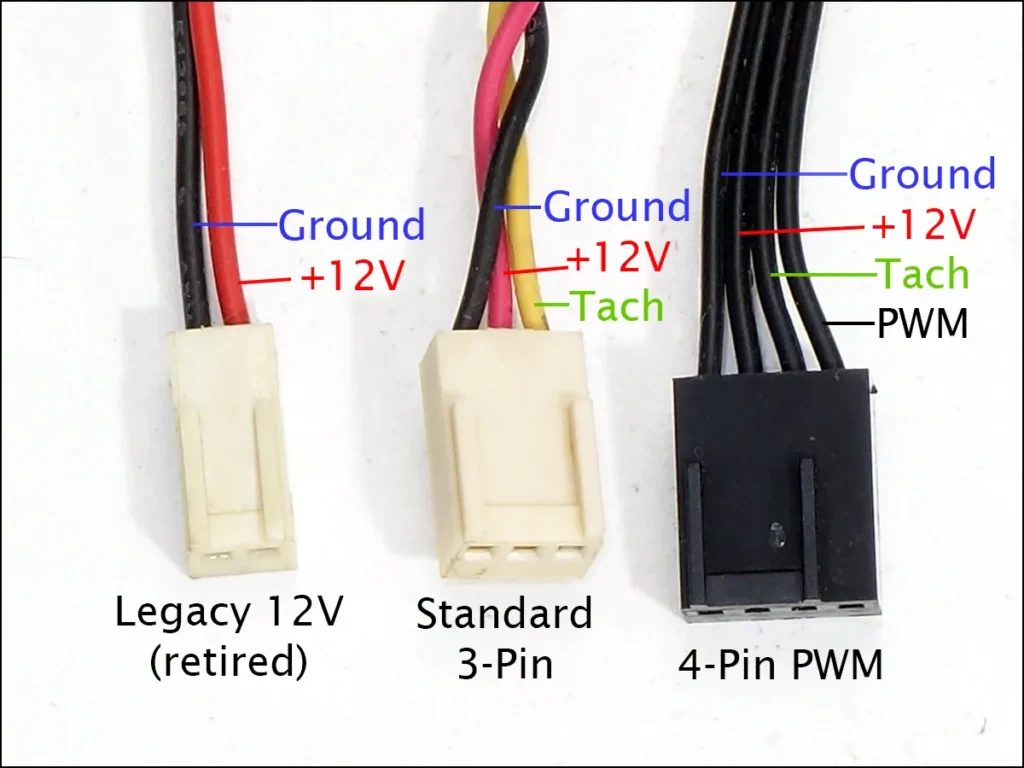
- “Ground” refers to the zero-volt (0V) path by which energy returns to the source.
- “+12V” refers to the supply line for powering the fan.
- “Tach” refers to the RPM detection lead, which pulses 12V once per revolution.
- “PWM refers to a feedback signal for pulsed-voltage speed control.
Older motherboards used separate voltage controllers for individual fan circuits, the expense of which caused most manufacturers to wire all of their fan headers to one or two circuits. RPM detection was important because fan motors that were powered at too low a voltage to spin could overheat. Most motherboards also use the CPU fan’s RPM signal to determine whether a CPU cooler is installed, and will halt boot while returning a “no CPU fan detected” error whenever your fan is unplugged (or plugged into something else).
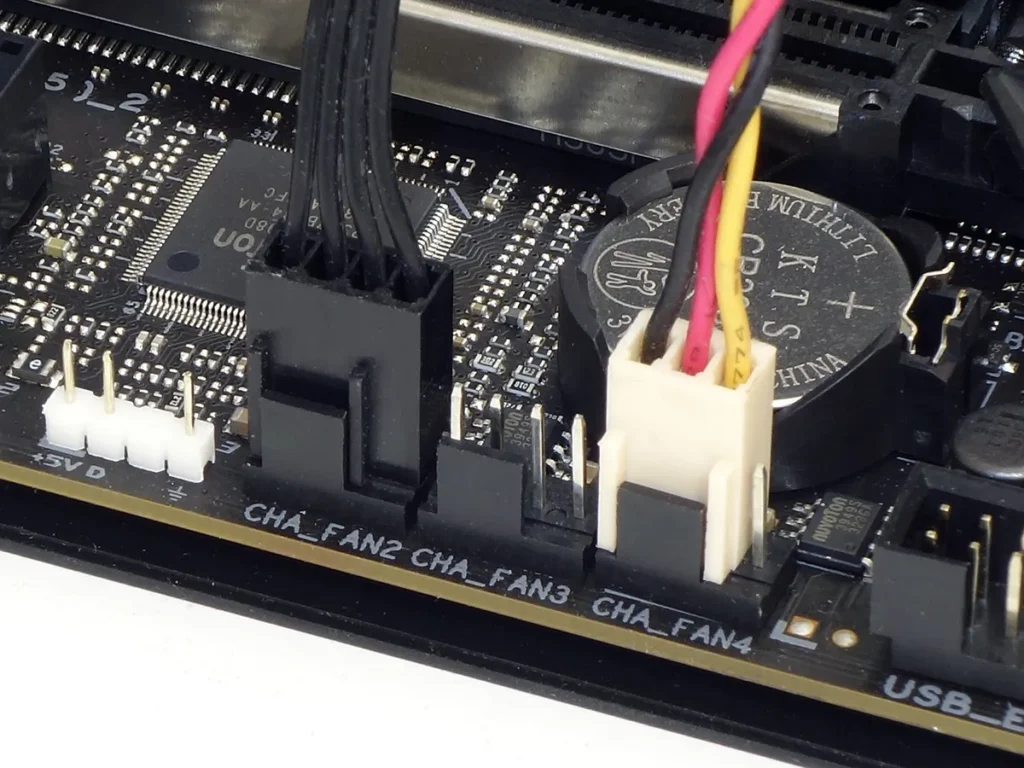
The newer PWM standard has allowed motherboard manufacturers to skip the fan voltage controller and instead send a signal for the fan to repeatedly power on and off to reduce speed, but most high quality motherboards have both voltage control and PWM control options on the same header. To allow for that, the four-pin PWM fan header design has been keyed to accept the older 3-pin fans, as shown.
Other Connectors
Because cheap motherboards tend to have few fan headers, cheap cases often come with one fan that connects directly to the power supply via an IDE/ATA (legacy hard drive) power cable. The cable shown in this example has both an input (facing the camera) and output (facing away) connector, which allows several fans or even an old ATA hard drive or optical drive to be powered from a single power supply connector.
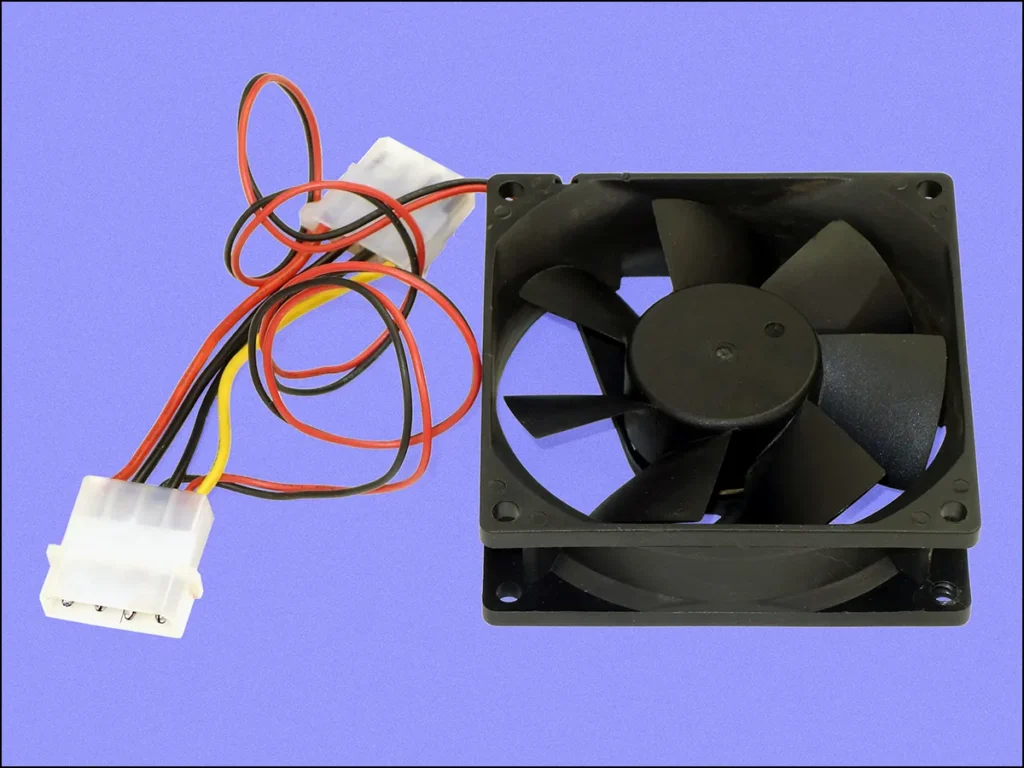
Most builders refer to these AMP 480424-style connectors as “Molex Connectors”, even though the Molex brand has more broadly been associated with devices such as the 90331 motherboard power connector. Because we know better, we refer to the connector by the device type that it most commonly powered.
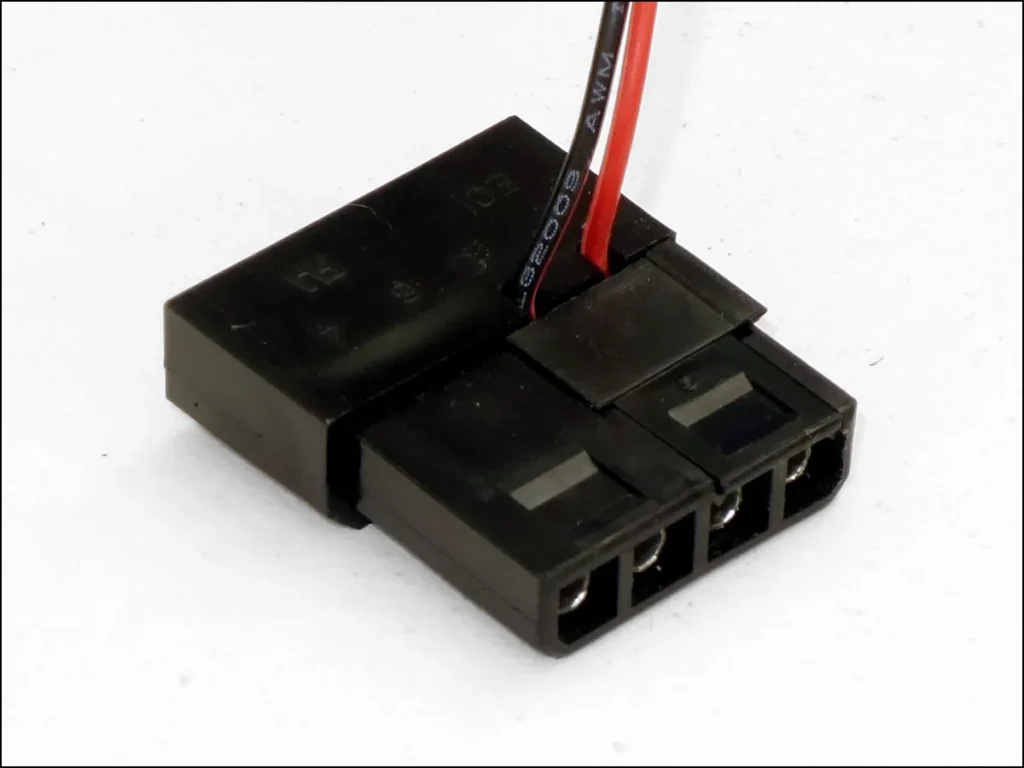
Some PWM cables have passthrough as well: Unlike motherboard headers, the output pins on the passthrough connector are surrounded by a plastic shell to prevent the power pins from shorting against the case.
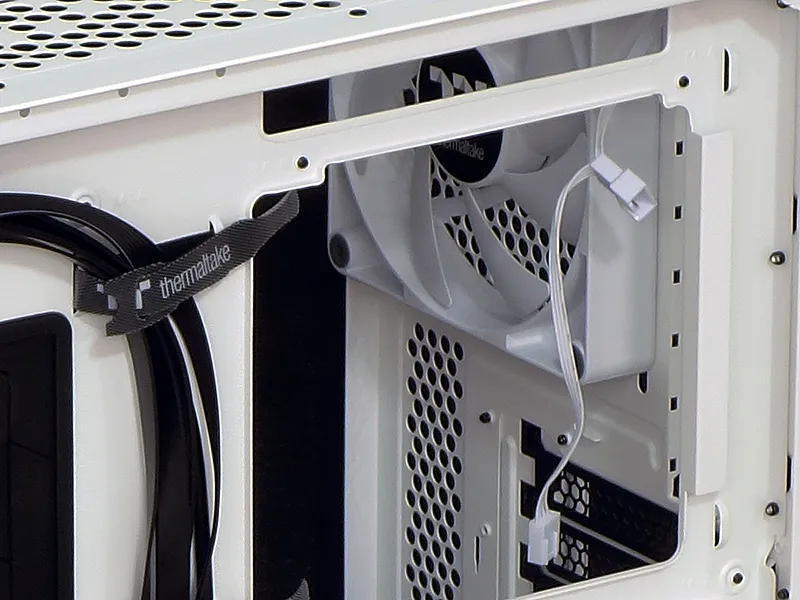
Cases priced around $60 to $80 often include a fan for which the cable features both a 3-pin motherboard header and ATA style power connector: Here’s an example dangling from the factory rear fan in our Yeyian Hussar Plus review.
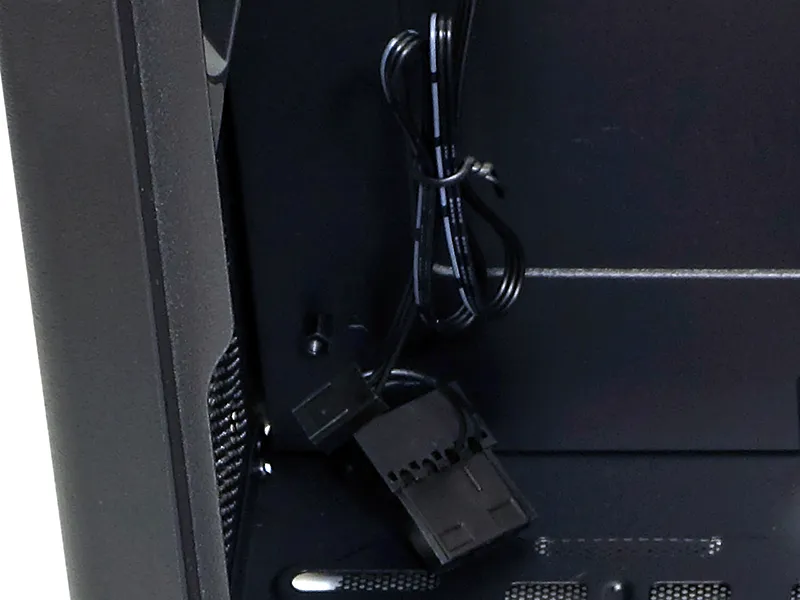
As ATA devices have been outdated for many years, some fan controllers instead use SATA style power connectors. Here’s one dangling from the fan controller of our Enermax SK30 review sample, along side ARGB and PWM input cables that allow the motherboard to treat all of the connected fans as a single ARGB fan.
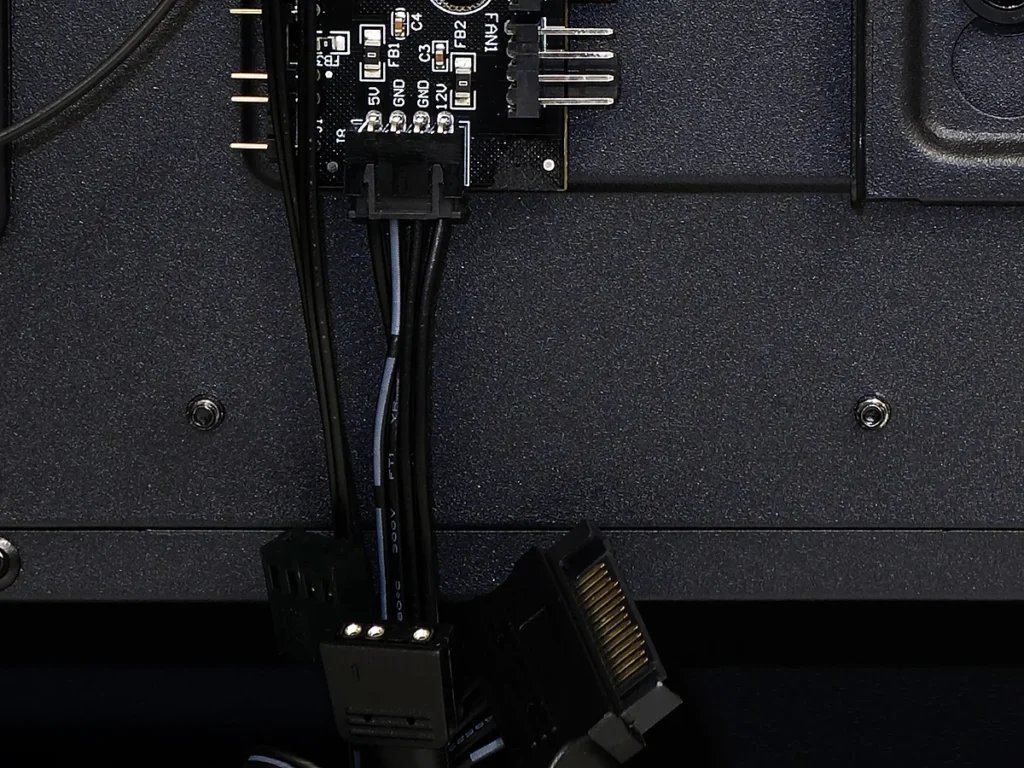
The three-pin ARGB header is already covered separately in our ARGB explainer, and there’s nothing special about ARGB fans that would cause us to treat their lighting differently than we would any of those other devices. Yet if that link could conclude the article, some would ask what these are:
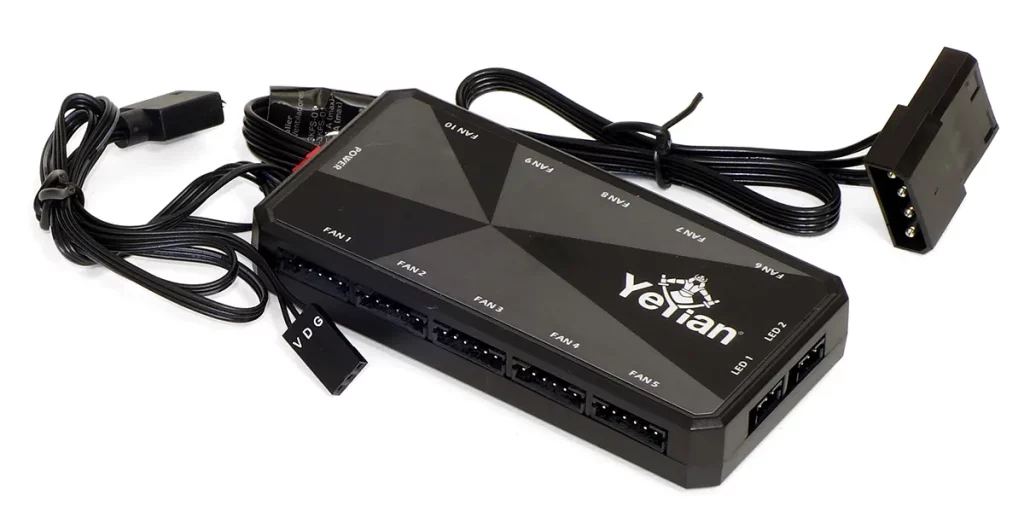
The above is an auxiliary fan controller that came with a fan set from Yeyian: Starting from the left rear we see an ARGB cable facing away from the camera, a VDG connector which uses the same ARGB wires but fits oddball motherboards, six proprietary fan headers that only fit the type of fan included with this controller, two custom LED headers that work with Yeyian’s proprietary ARGB lighting strips, and a passthrough-type ATA power cable that’s being used to power the fan controller.
Regarding the propriety six-pin fan cables that fit the above controller, we find it quite common for builders to present images of such to support forums while asking how to connect those to their motherboard headers: Whether these questions are earnest or intended to waste respondent’s time, the answer to all things proprietary is to read the manual.
